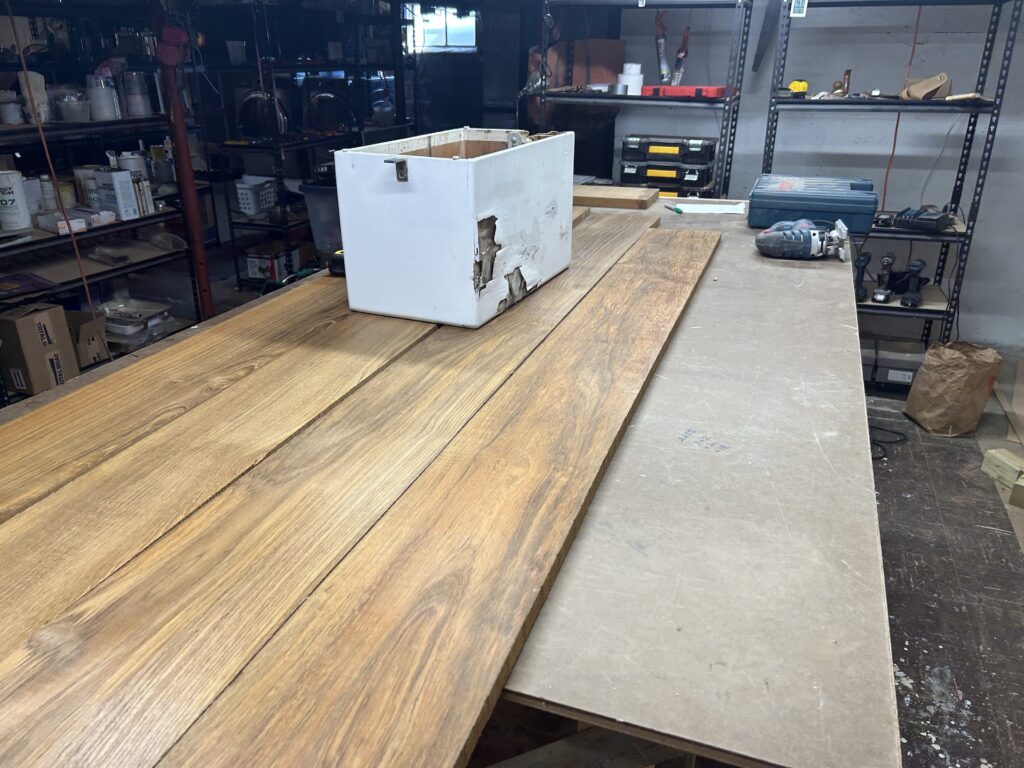
The customer owns a beautiful, blue-hulled Hinckley sloop. He wants to replace an old and dilapidated plywood cover-box for the propane tank with a varnished teak box. The image below shows the original box sitting on top of the teak stock that will be used to make the new box.
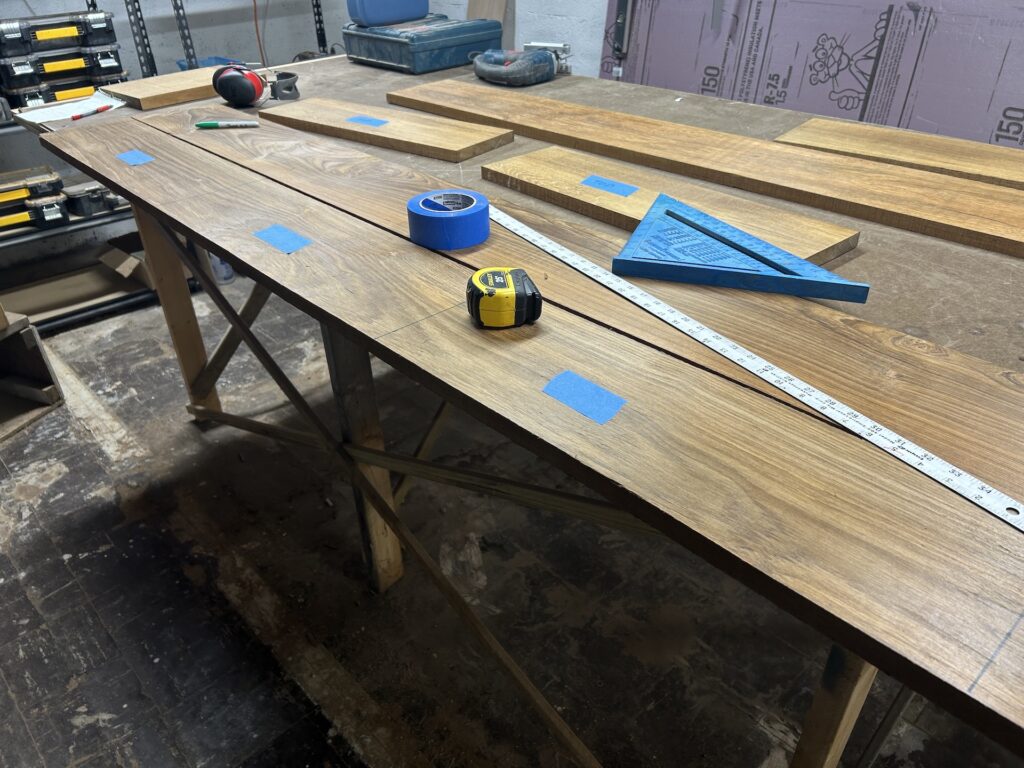
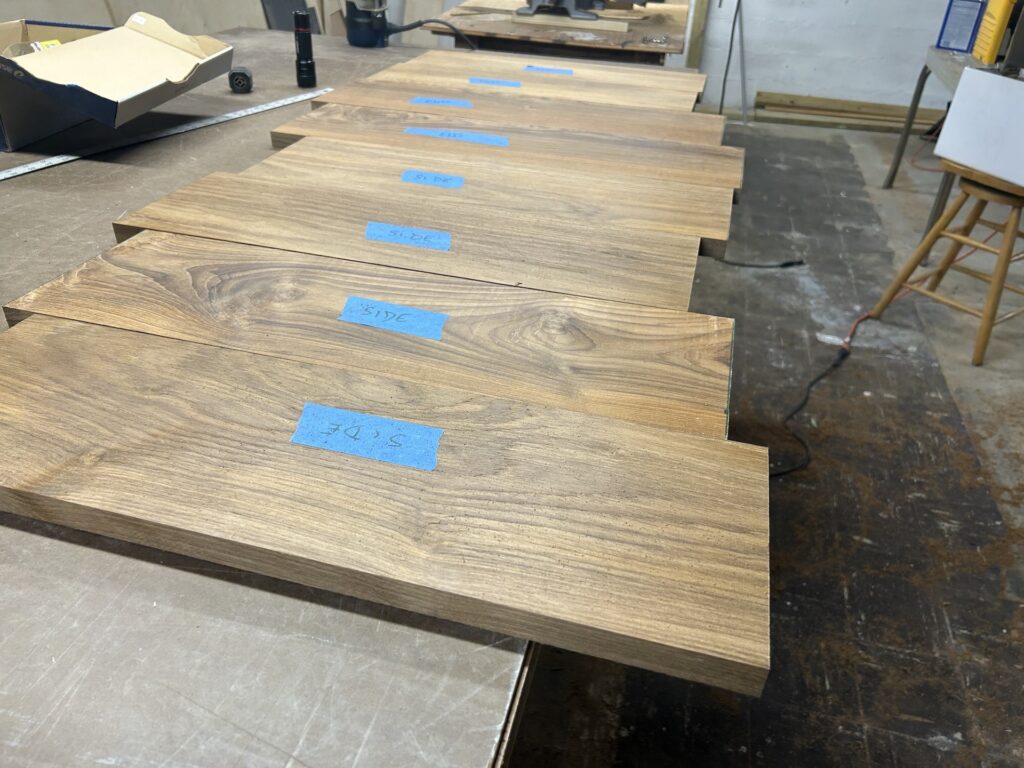
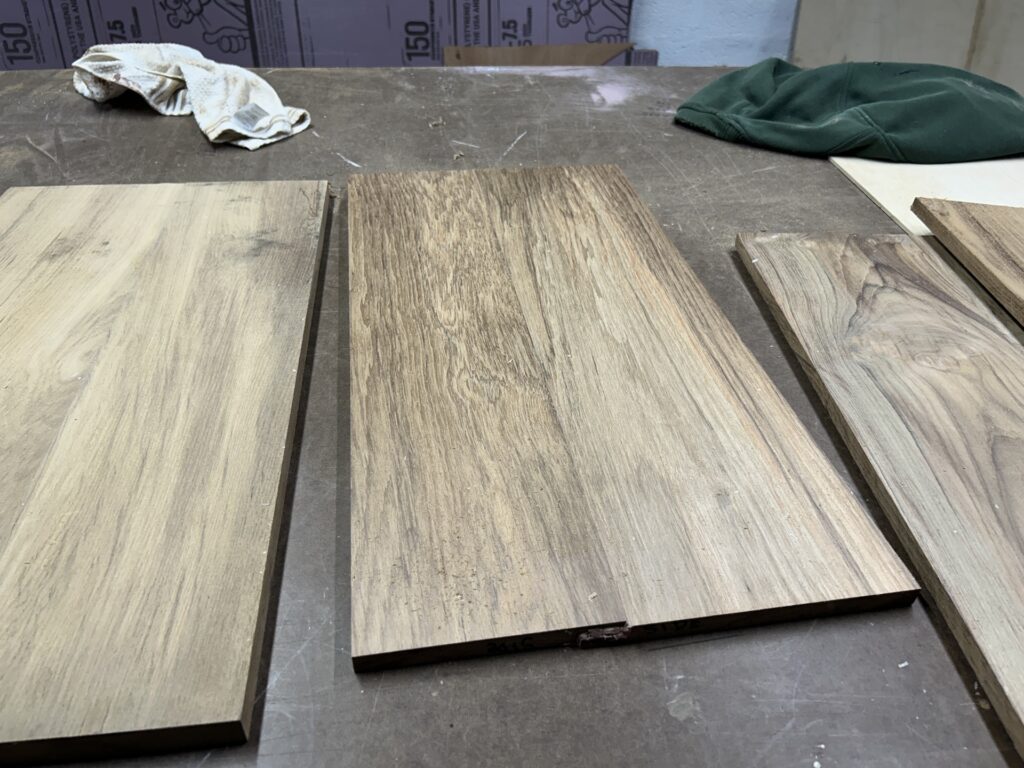
I planned out the cuts and labeled the pieces (top, sides, and ends).
Rough lumber has uneven edges, and typically one edge must be straightened before a table saw can be used to straighten the other edge. A good-quality jointer can be used to straighten and edge, or a so-called “jointing jig” on the table saw. Here. however, I simply ran a straight router bit along the edge, using a piece of scrap plywood as a guide.
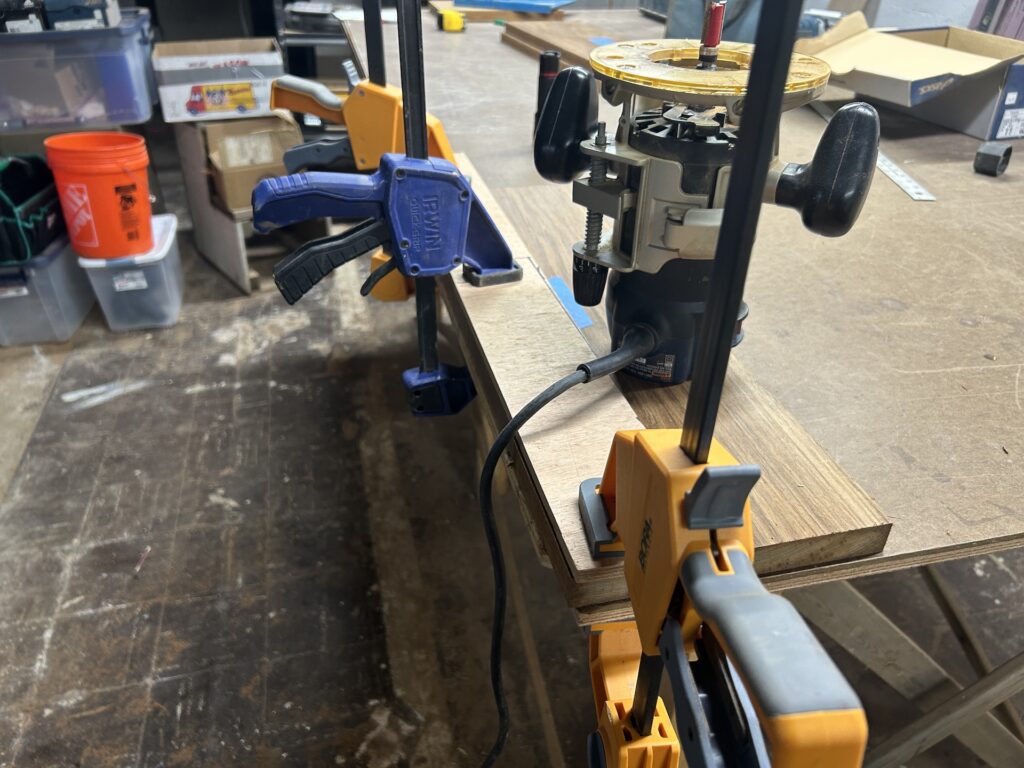
After straightening the other edge with the table saw, the pieces are ready for next steps:
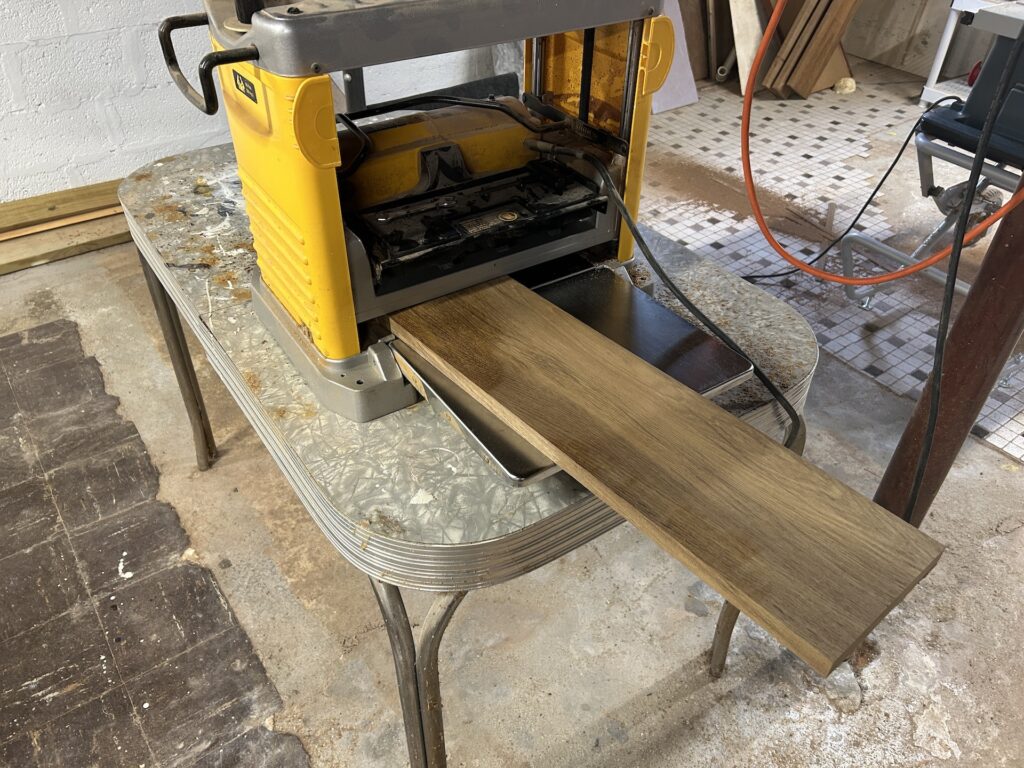
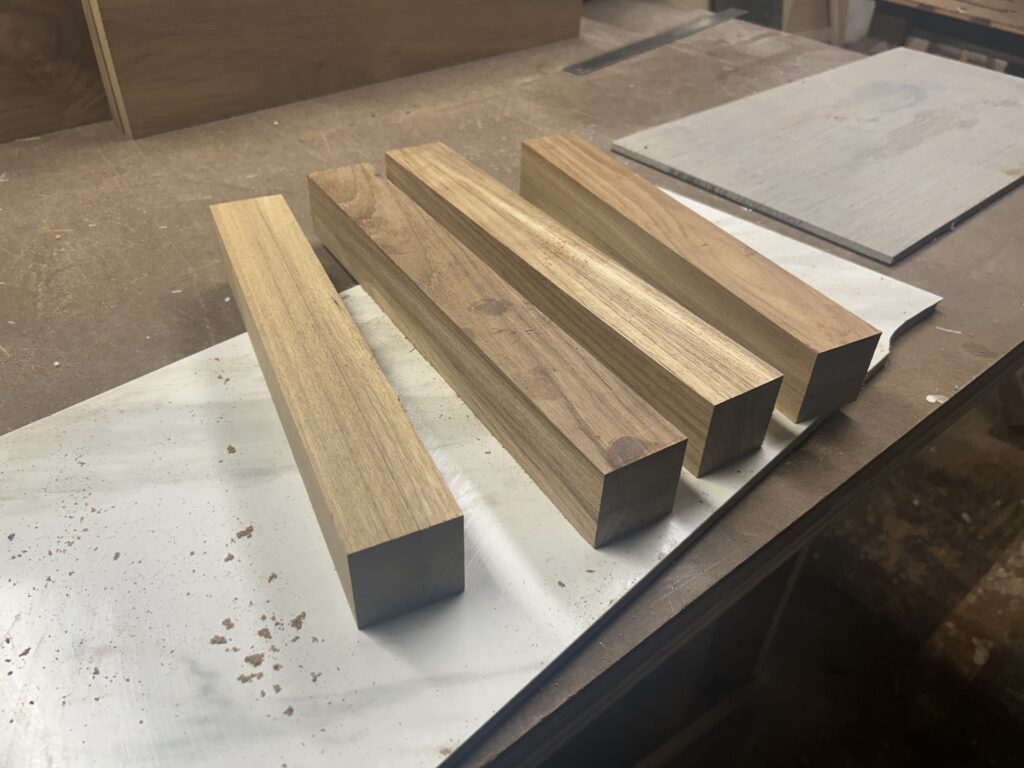
The next step was to plane the pieces to thickness, which I decided was to be 5/8 inch, just a bit thicker than the 1/2-inch plywood used to make the original box.

Corner blocks will be used to connect the sides at the corners. These need to have a square cross section of about 2in x 2in, so I had to glue up some off cuts to make up some thick pieces.
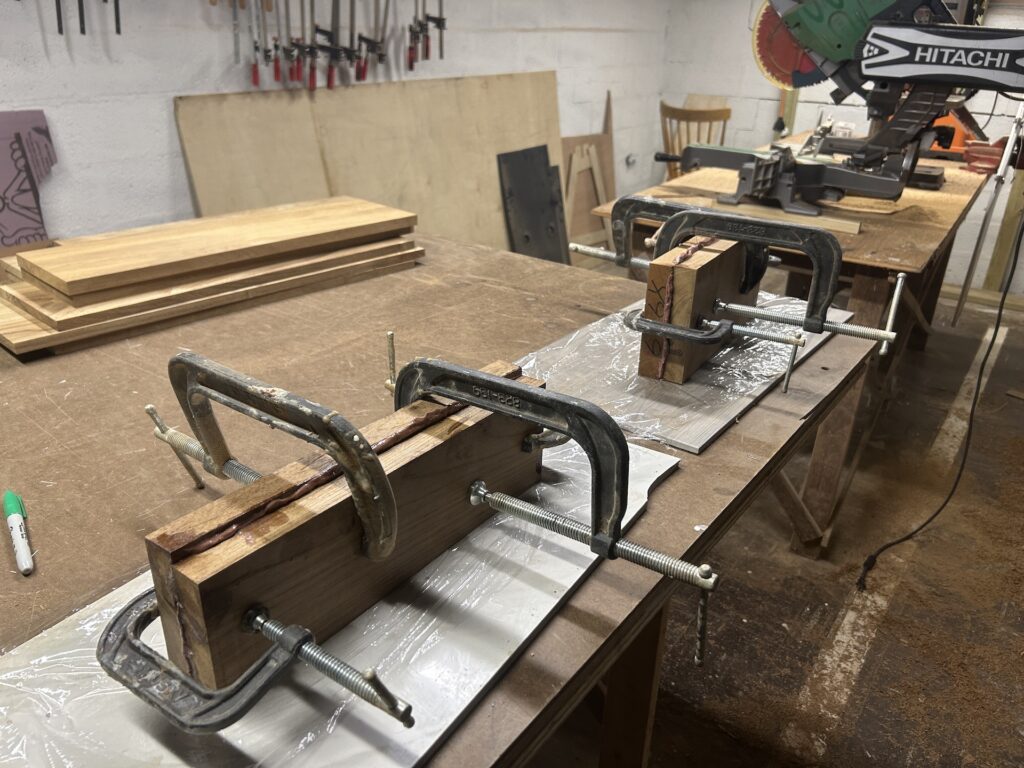
After the epoxy fully cured I cut them out,
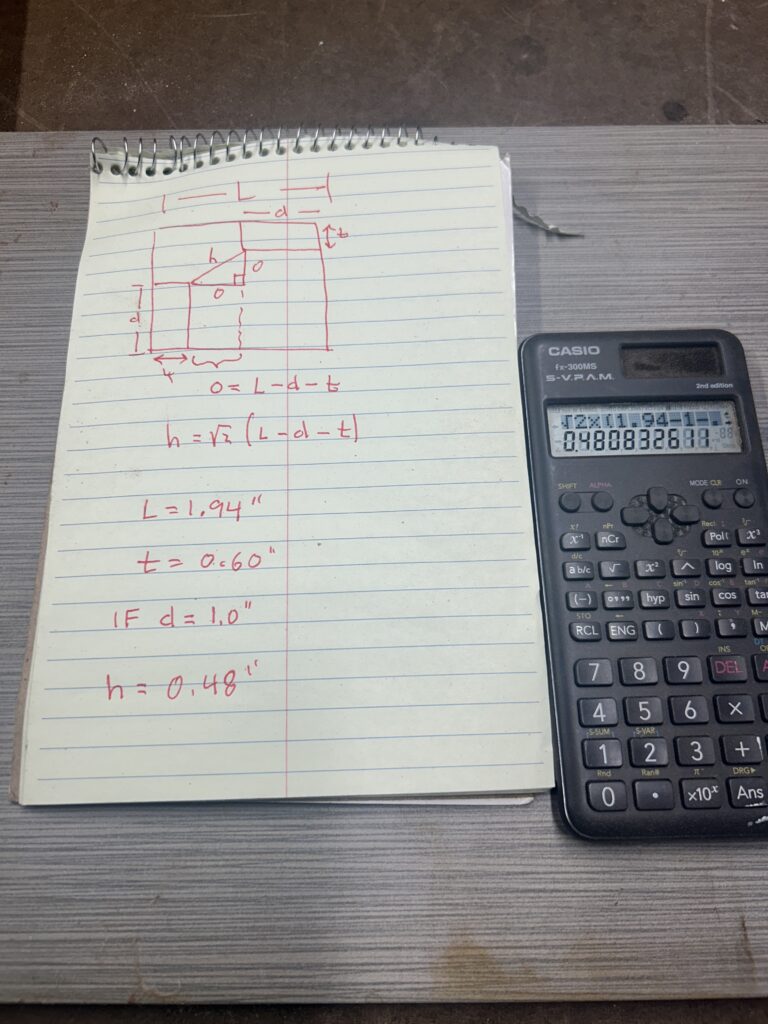
Careful consideration was given to the length and depth of the rabbets that will accept the sides. The diagram below illustrates a dimension “h” that I didn’t want to be too small. I calculated that with my desired rabbet length (d = 1.0 in) and depth (t = 0.60 in) that h = 0.48 in, which I figured left plenty of “meat” between the rabbets.
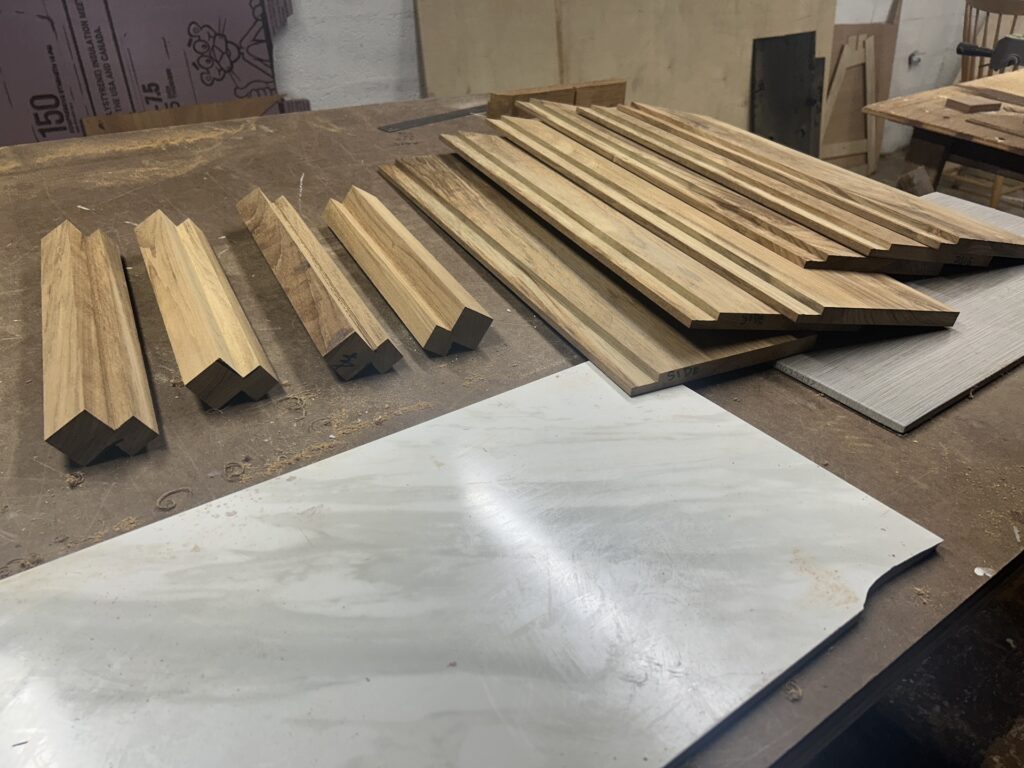
I used a combination of dadoing and sawing to make the rabbets in the corner blocks (on the left in the photo below). To make the sides, I have to join boards, and dadoed the rabbets for the lap joints (on the right in the photo below).
Dadoing leaves a pretty rough track, so I used my rabbeting block plane to smooth the rabbets.

Thickened epoxy was the glue for all joints:

I have several pieces of ceramic tile that I have often used for clamping due to their having a very flat surface. Provided the rabbets have the correct depth, clamping them to the tile forces the two boards to be in the same plane during glue up.
Out of the clamps and sanded. I was pleased with the tightness of the joints.
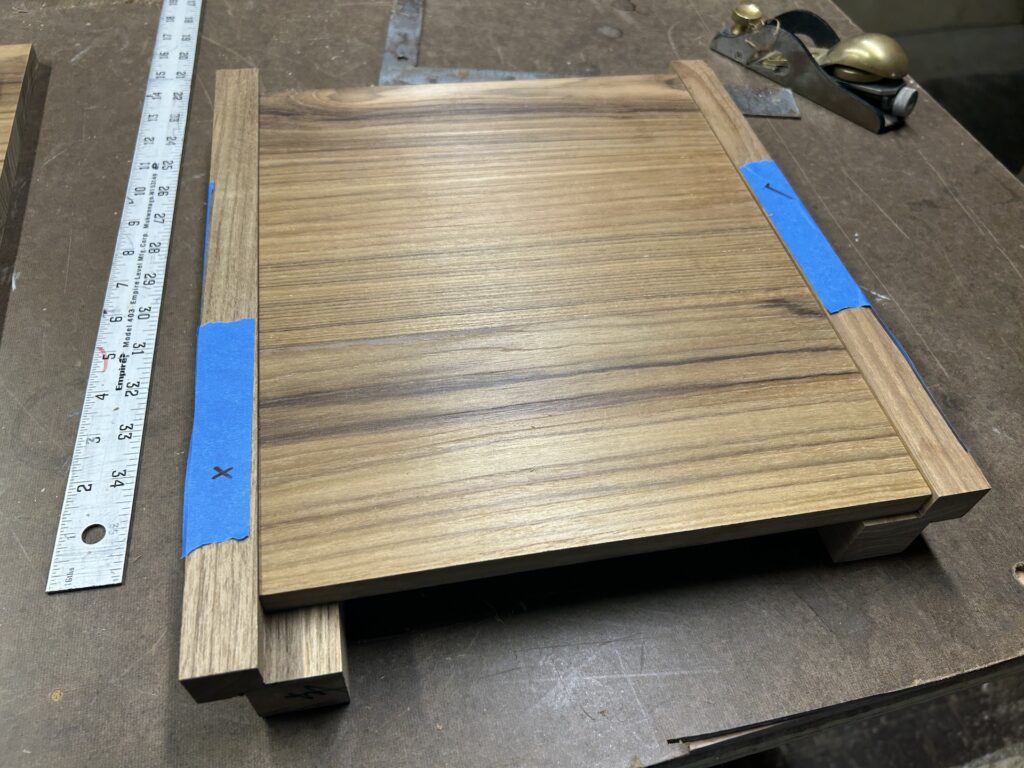
A test fit to check the joints with the corner blocks.
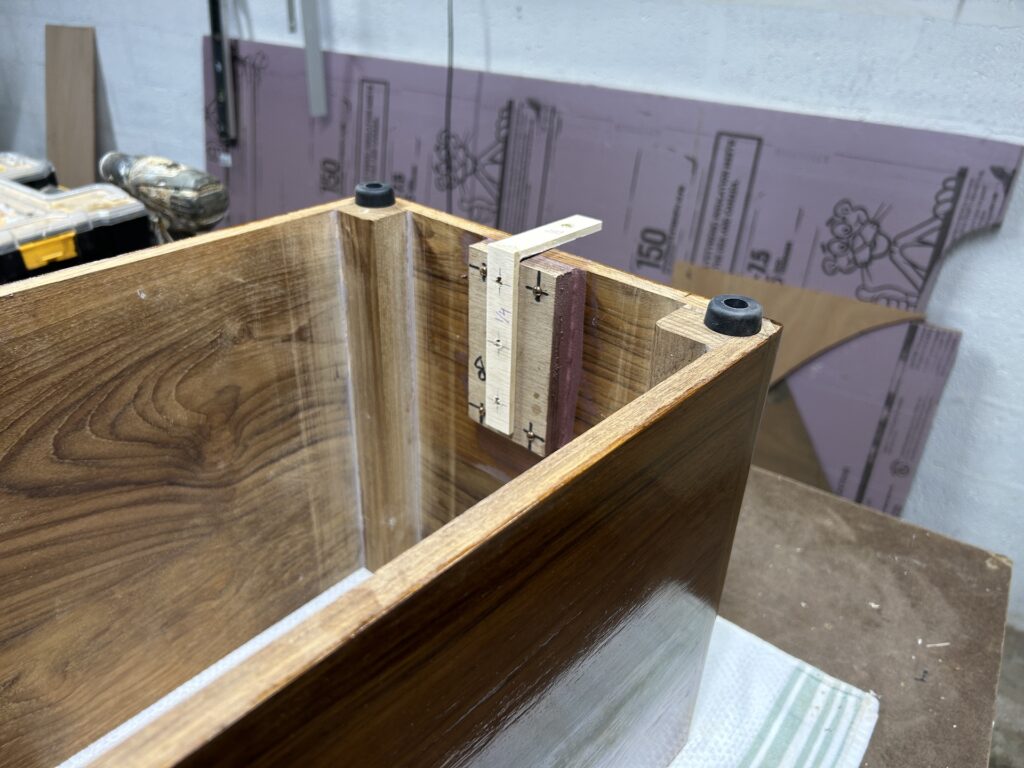
Some of the blocks needed minor adjustments. In the image below the “x” indicates that I needed to remove some material here and there to improve the joint.
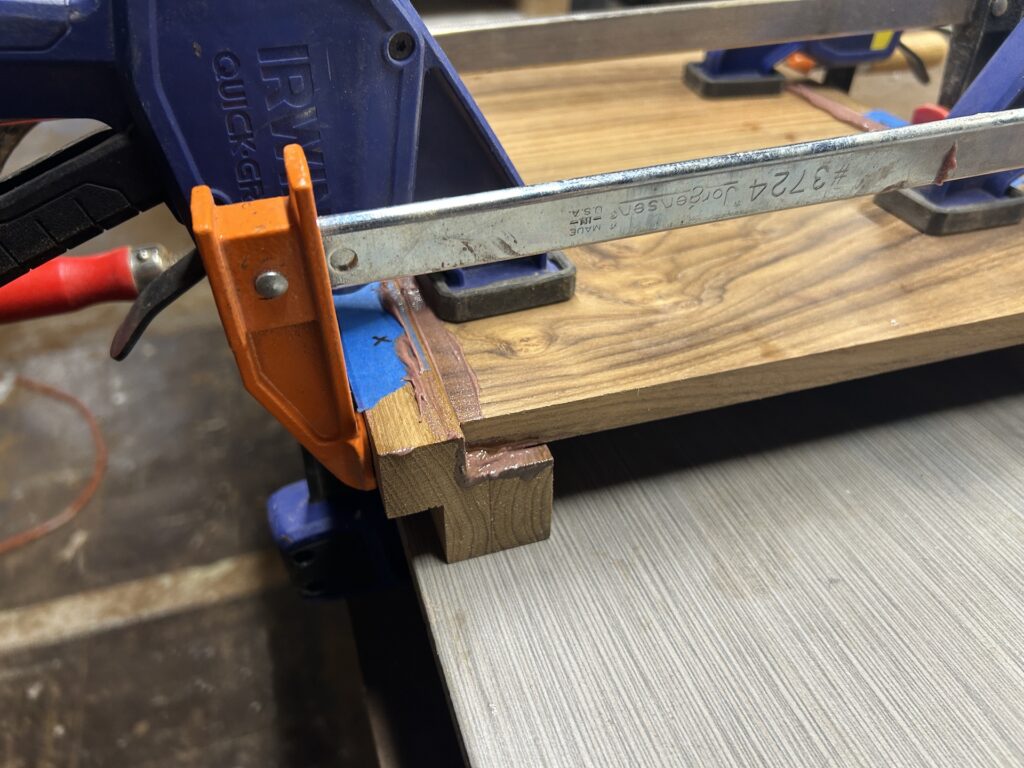
Utilizing the ceramic tile again for clamping the corner blocks to the short ends of the box:
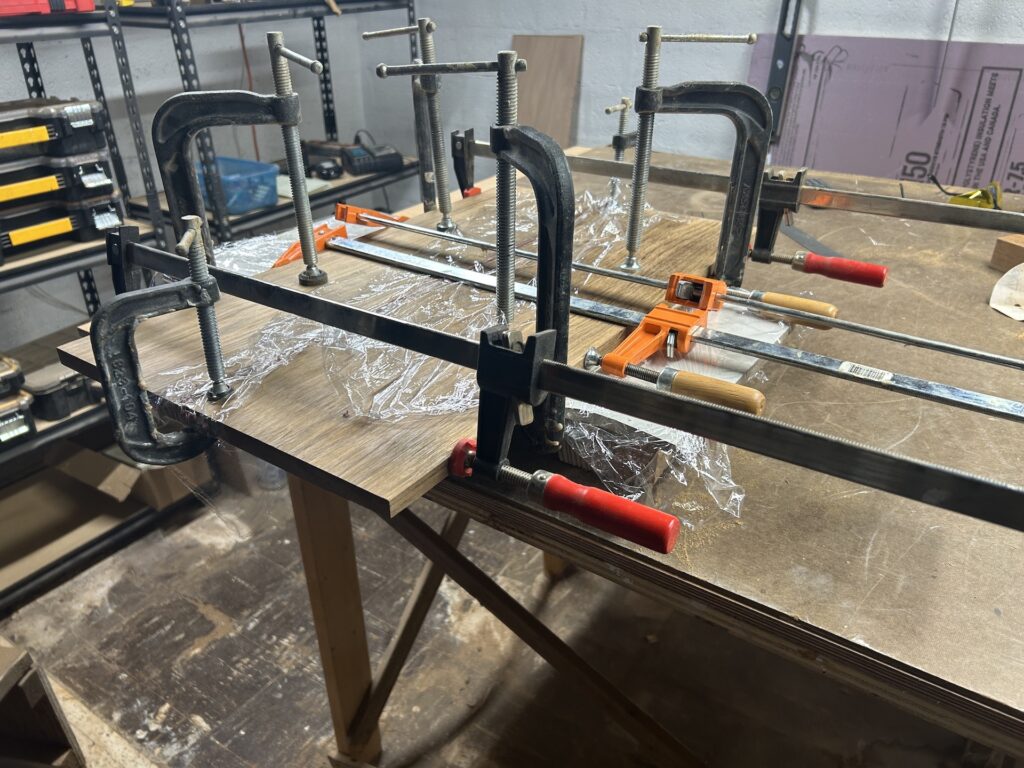
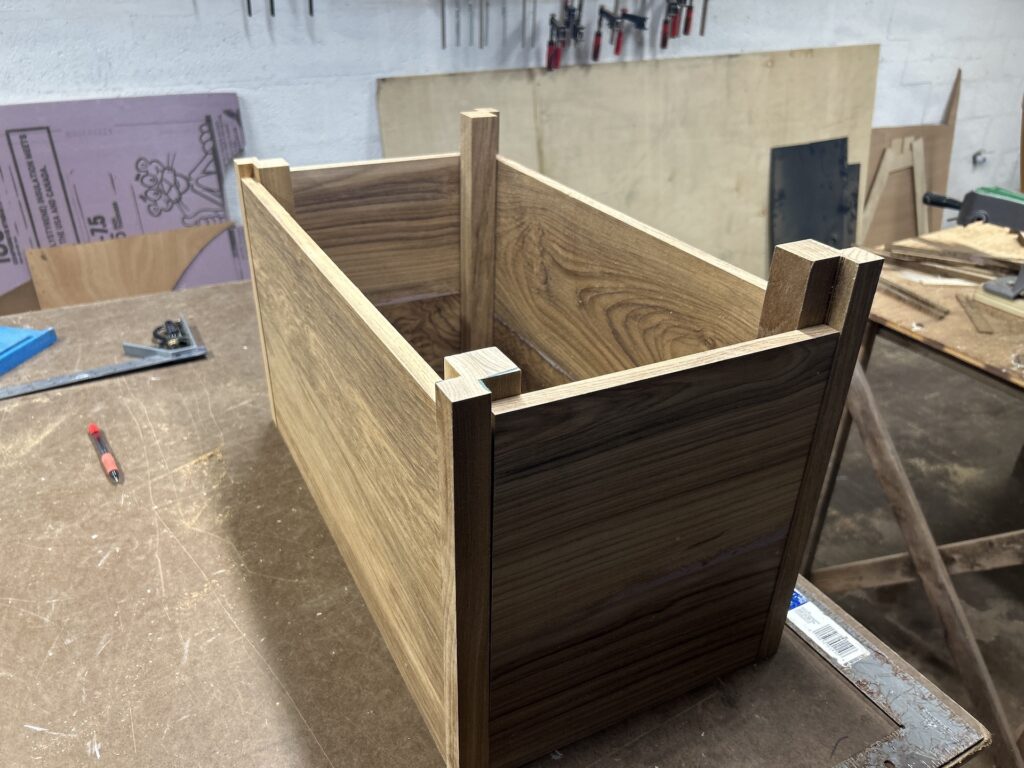
Now the ends are joined to the corner blocks and it’s time to glue in the long sides. This is a very important operation. If the box ends up out of square, then it will have happened during this glue up. This is a dry fit only:
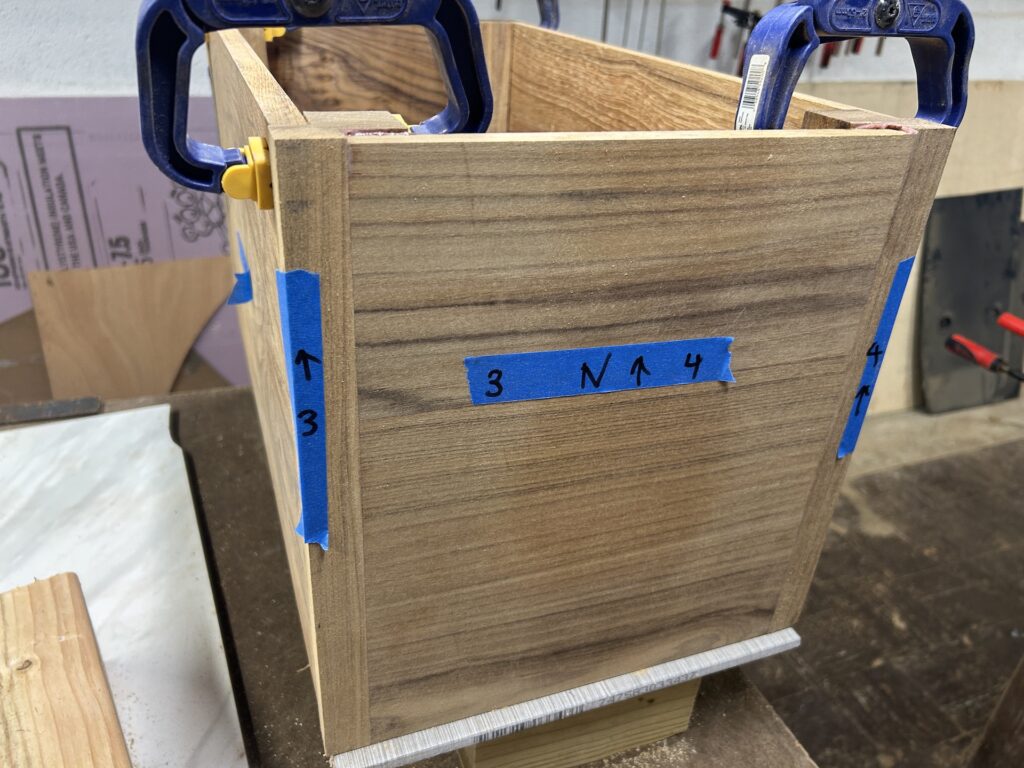
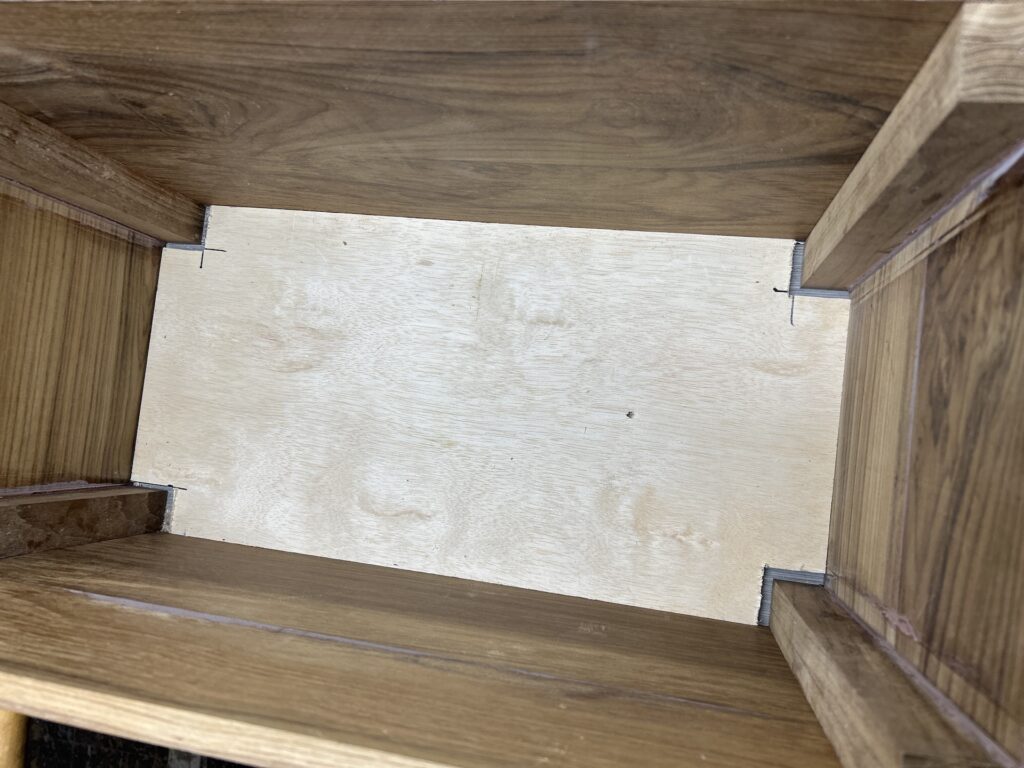
In order to ensure a square box, I cut a piece of scrap plywood to just about a 1/32 in smaller than the inside dimensions of the box. In this way, with the plywood inserted as shown below, the box can’t twist when under the pressure of the clamps.
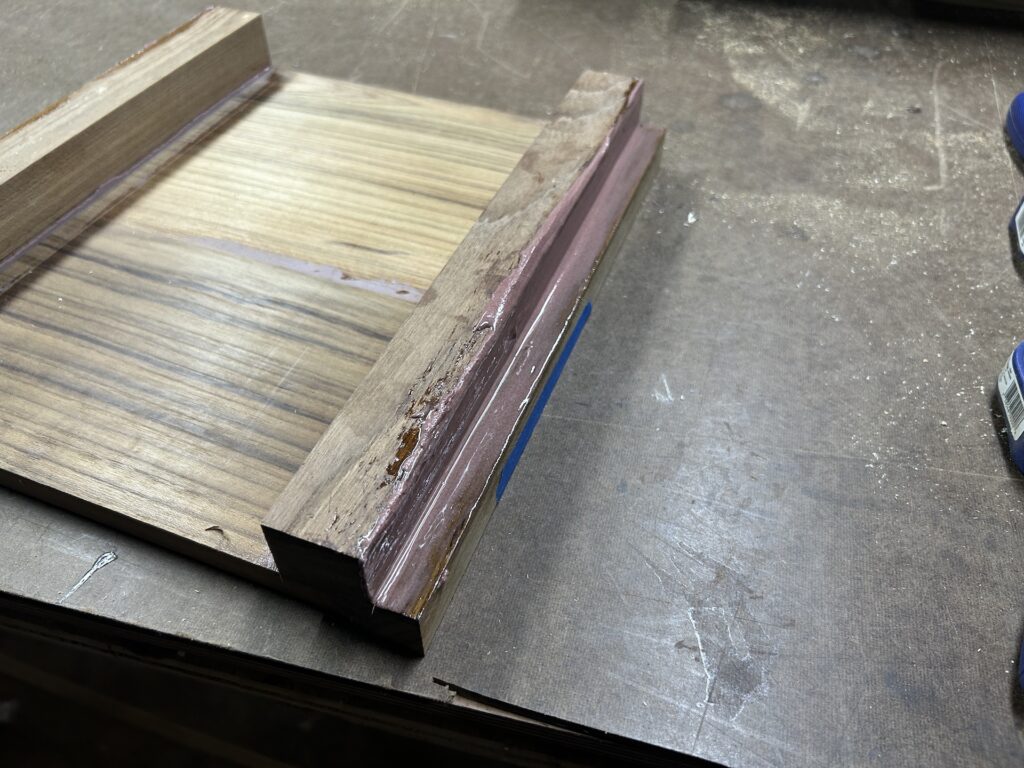
As with the other joints, I used thickened epoxy. It’s very important, however, to start all such joints by wetting the surfaces with straight epoxy first. The straight epoxy, being less viscous than thickened, will be drawn into the wood to some extent, leading to a stronger joint.

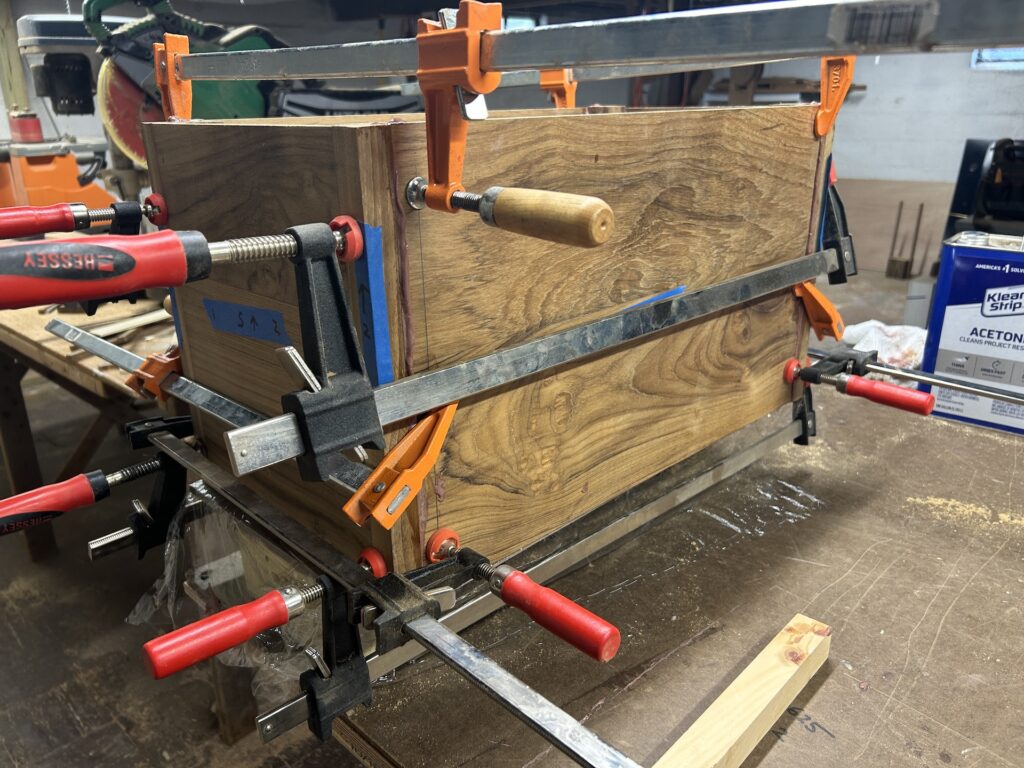
Finally, the clamping:
After the epoxy fully cured I removed the clamps and sanded off the squeeze-out and I was again pleased by the tightness of the joints.
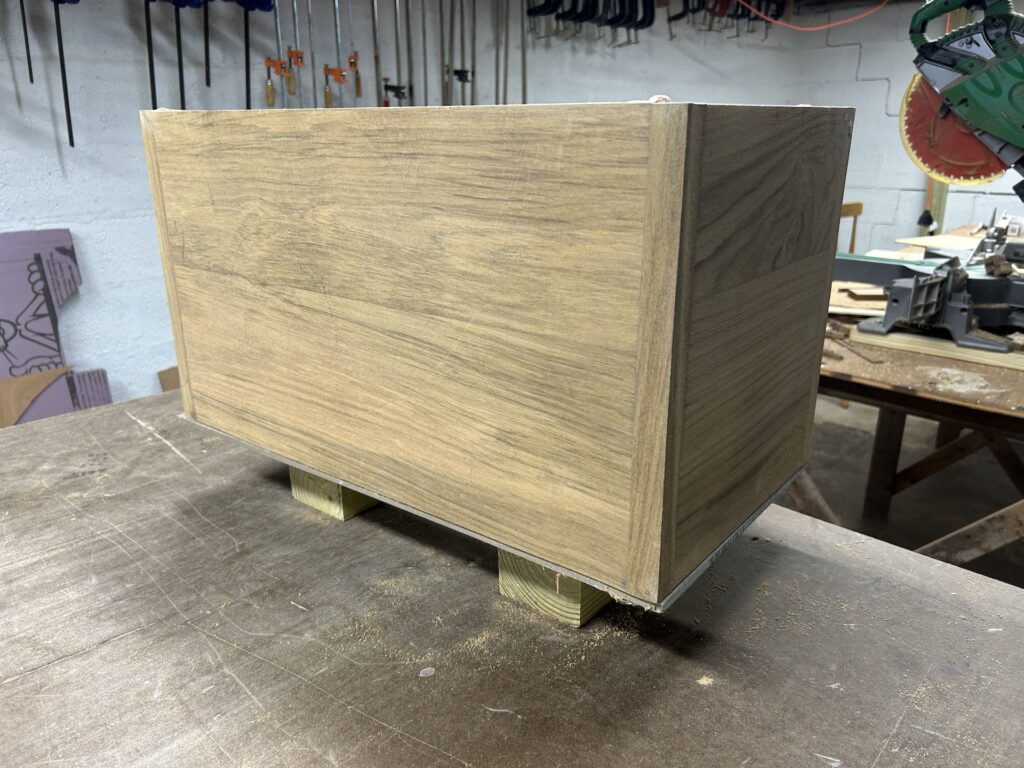
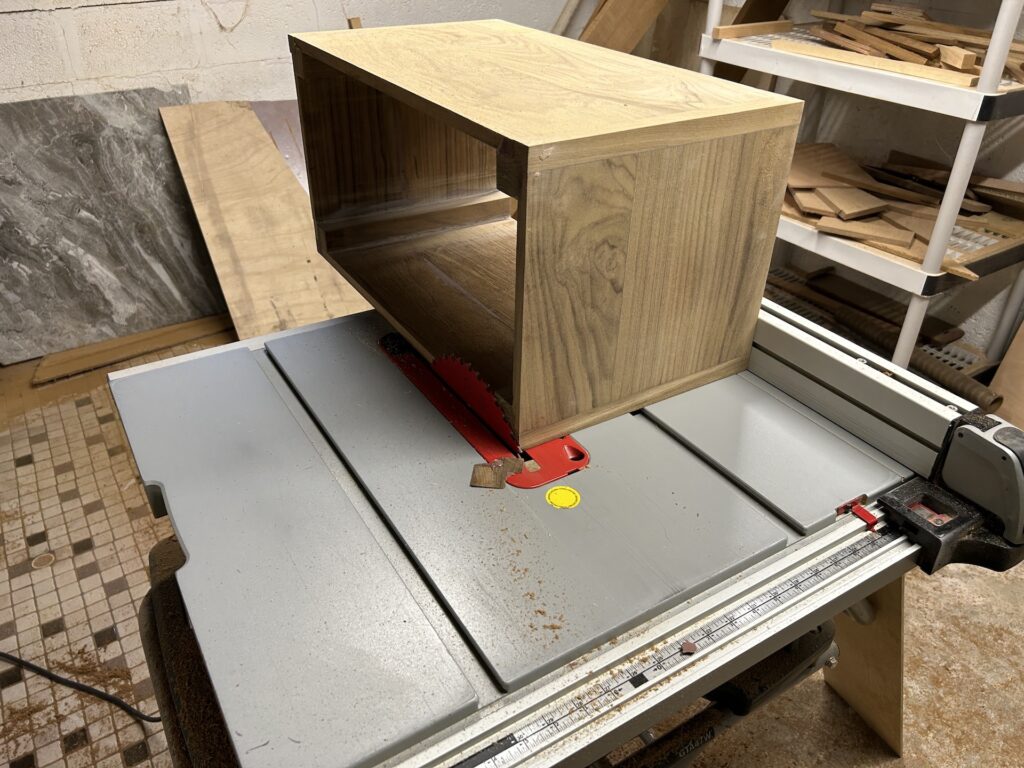
I deliberately left the corner pieces a bit long so they were proud on the top end.

The table saw took care of that:
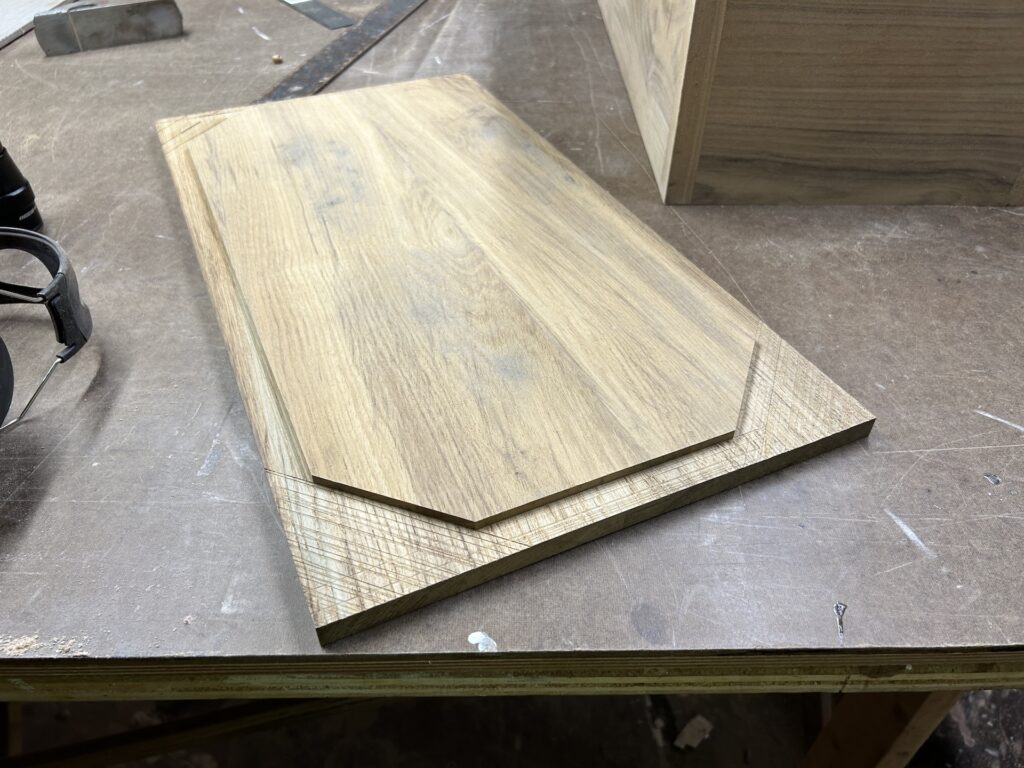
The original box had a fixed lid, so the entire box had to be taken off the deck each time the customer wanted to open the valve on the propane tank. We settled on a removable lid. The image below shows the underside of the lid and the shallow rabbet I dadoed out. We decided on no external hardware on the box, so in this way the lid will drop snugly into the top of the box.
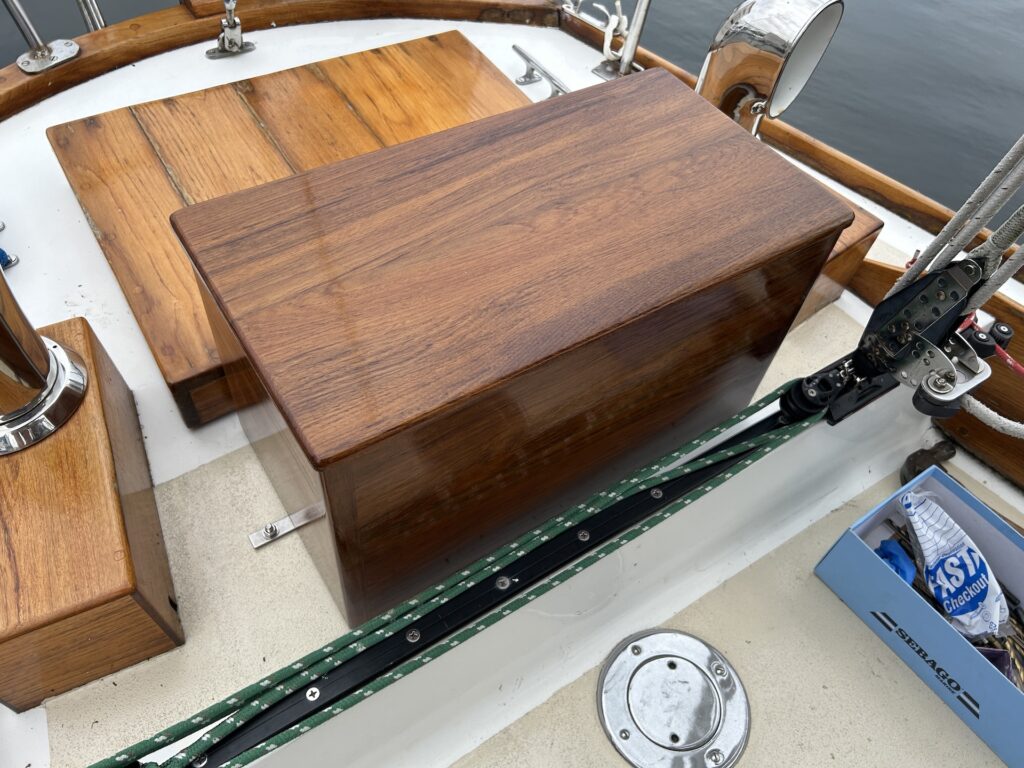
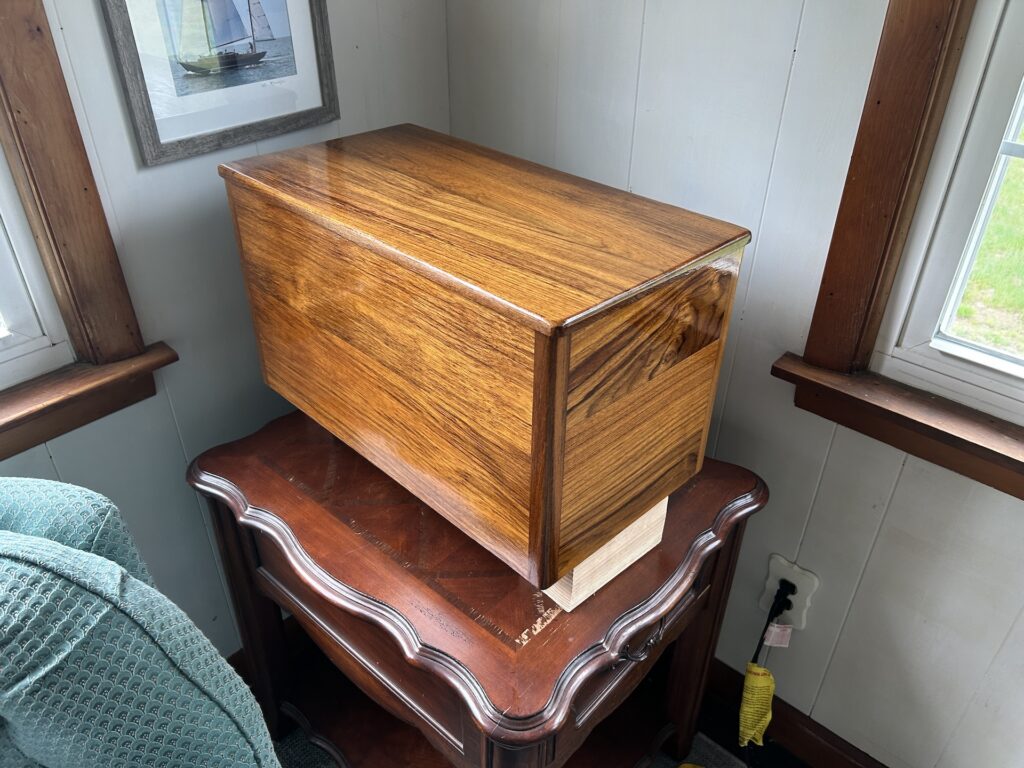
Fast forward a few months, and here is the box and lid after rounding corners, sanding, and about eight coats of varnish, but there’s still more work to do.
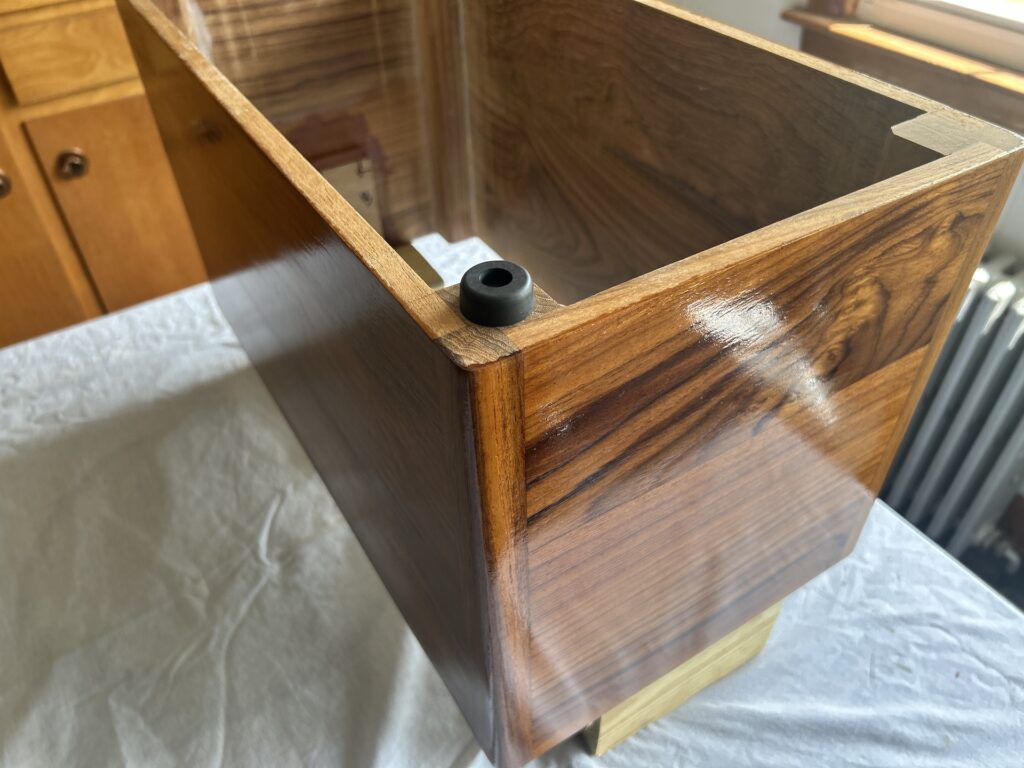
The box sits on a slightly cambered deck, so I ordered and installed some rubber feet. The original box had much smaller feet, but that box lacked the corner blocks that facilitated accepting more prominent feet.
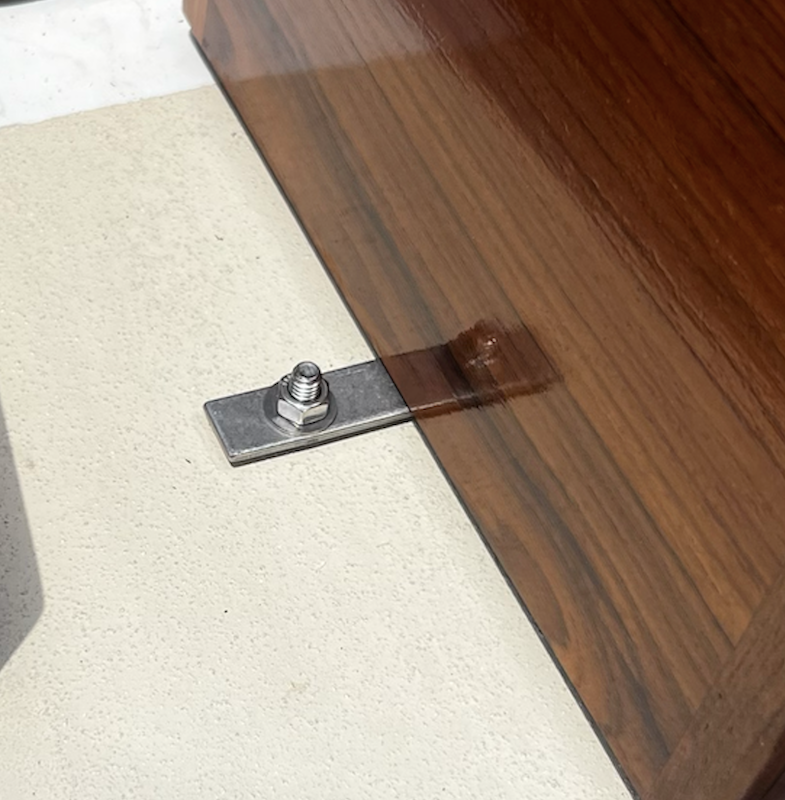
The box also needs to be held down to the deck and the original hardware was not suitable for the new box. In the image below you can see a rectangle of marine plywood that I’ve screwed and epoxied to the inside of the box. There is a second on the other end of the box. Stainless steel brackets will be fastened to the plywood. I had to have them custom made and the L-shaped contraption is the mock up that I gave to the metal fabricator.
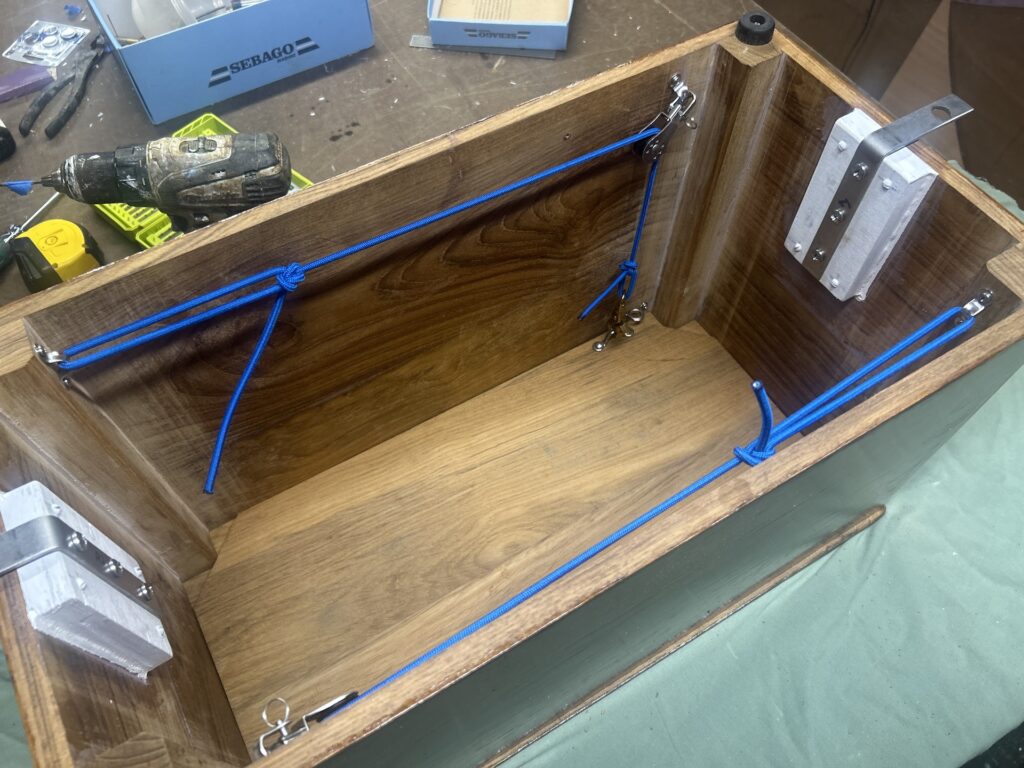
In the image below you can see that I’ve painted the plywood and installed the brackets. You can also see the hold-down hardware for the lid. It consists of eight pad eyes, two swiveling Harken blocks, two clips, and some bungee cord. In the image below the clips are attached to pad eyes on the lid, and thus are in hold-down mode.
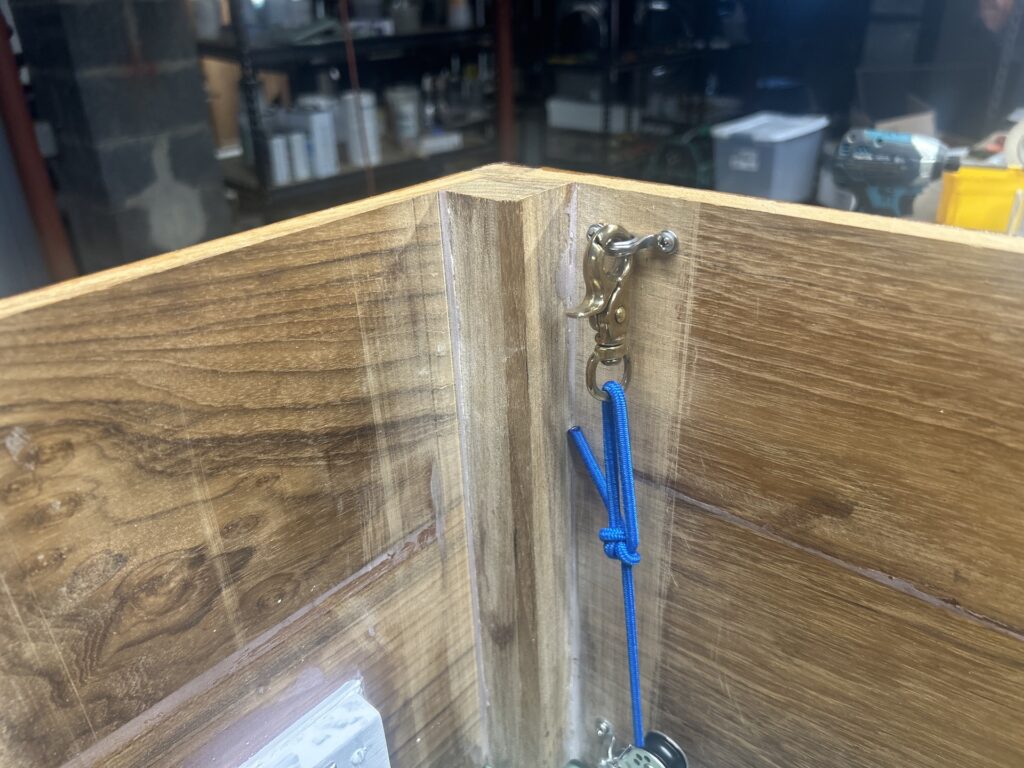
When the clips are not attached to the lid, they can be attached to pad eyes near the top of the box, thus avoiding to have to fish them out from the bottom of the box.
Installation day finally came and the image below shows how the brackets are secured to the deck. I tapped holes to accept 5/8-inch/18 bolts, which were bedded in epoxy. For those who were about to ask, the deck here is not cored.
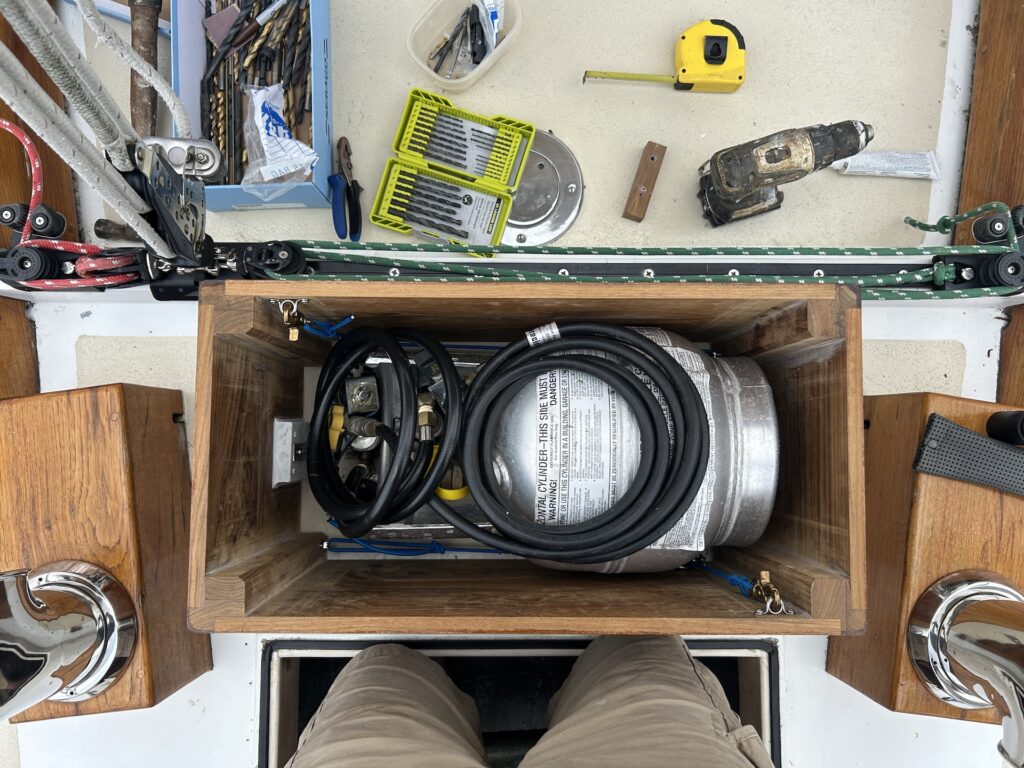
Looking down into the box with the lid removed:
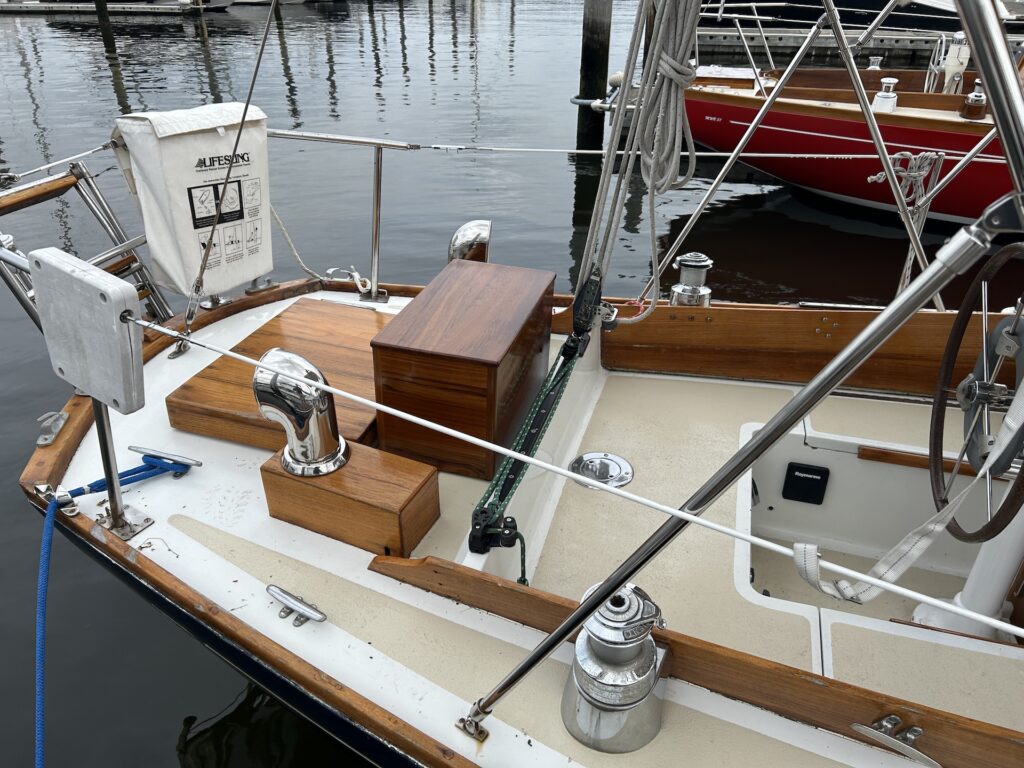
Installation complete: